Publish
Once a project is ready to go live, publish it in order to share with others. Projects can be published from within the editor and from the project overview in the workspace dashboard. To publish or edit publishing settings: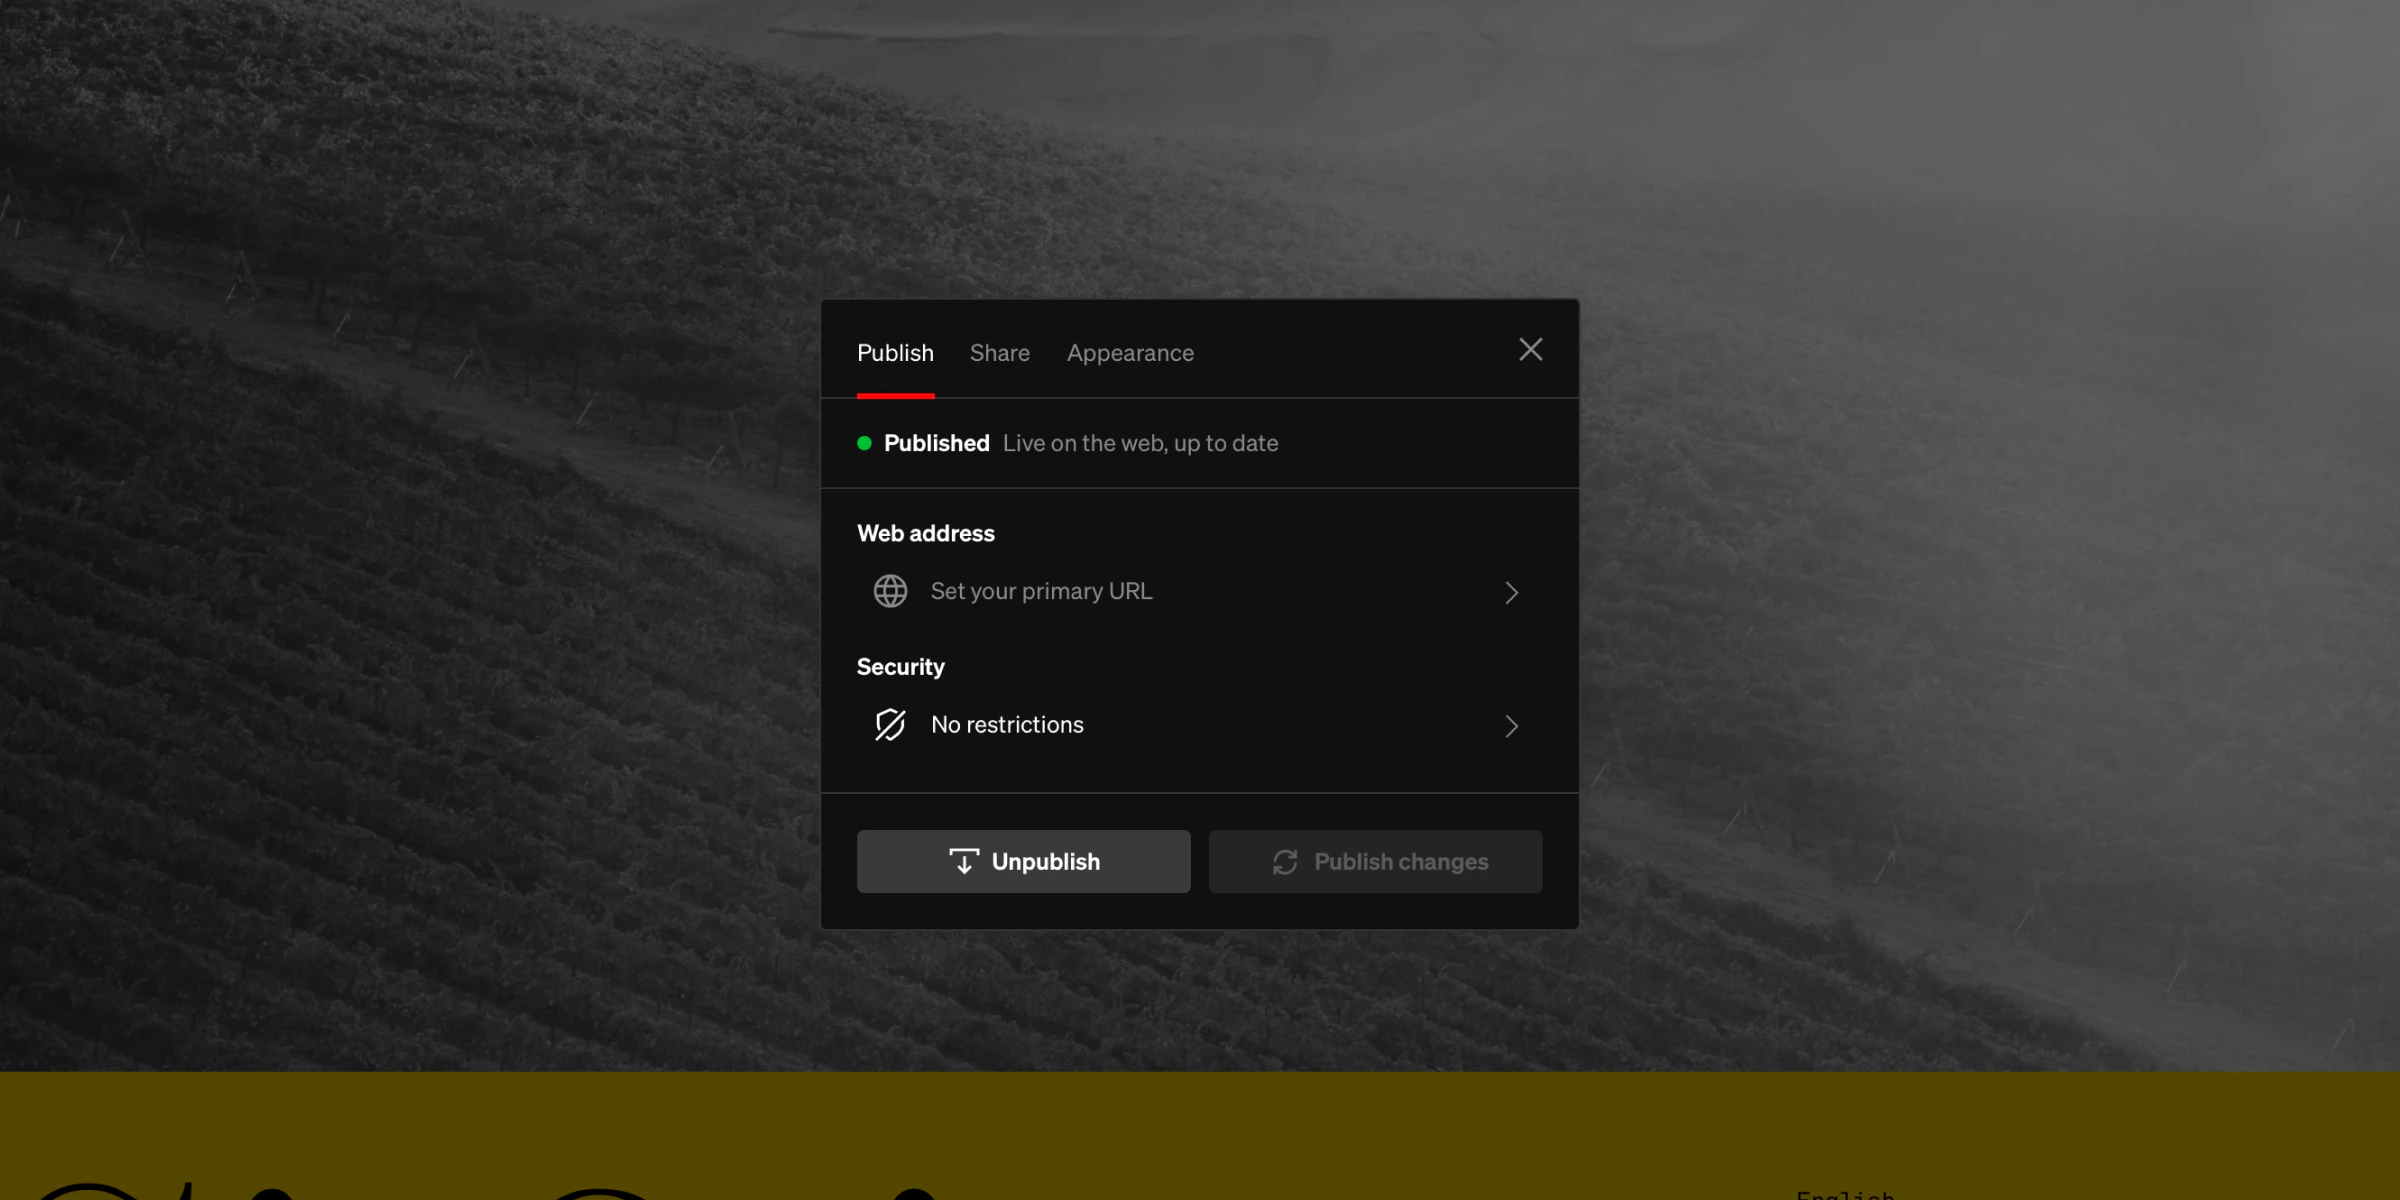
1
Open Publish & share window
From the project overview in the dashboard, select
Publish & Share from the context menu (three dots), or select the Status, Web address, or Security & access rows. From within the project editor, select the Publish & share button in the header.2
Enter web address
Enter your desired primary URL and subdirectory URLs
3
Set security & access
Select your desired security & access level
4
Optional: Set which pages are secure
If either Plain password protected or Sign-in required security types were chosen, set which project pages are restricted and unrestricted.
5
Publish
Select
Publish6
Share
You can now share the link to your live project with others
Keep in mind
- You can modify publishing settings at any time by returning to the Publish & share window.
- You can unpublish projects by returning to the Publish & share interface and selecting
Unpublish - A paid plan is required to publish
Web address
The project’s web address is the URL that is shown to viewers in their web browser’s address bar. There are two options when choosing a project’s web address: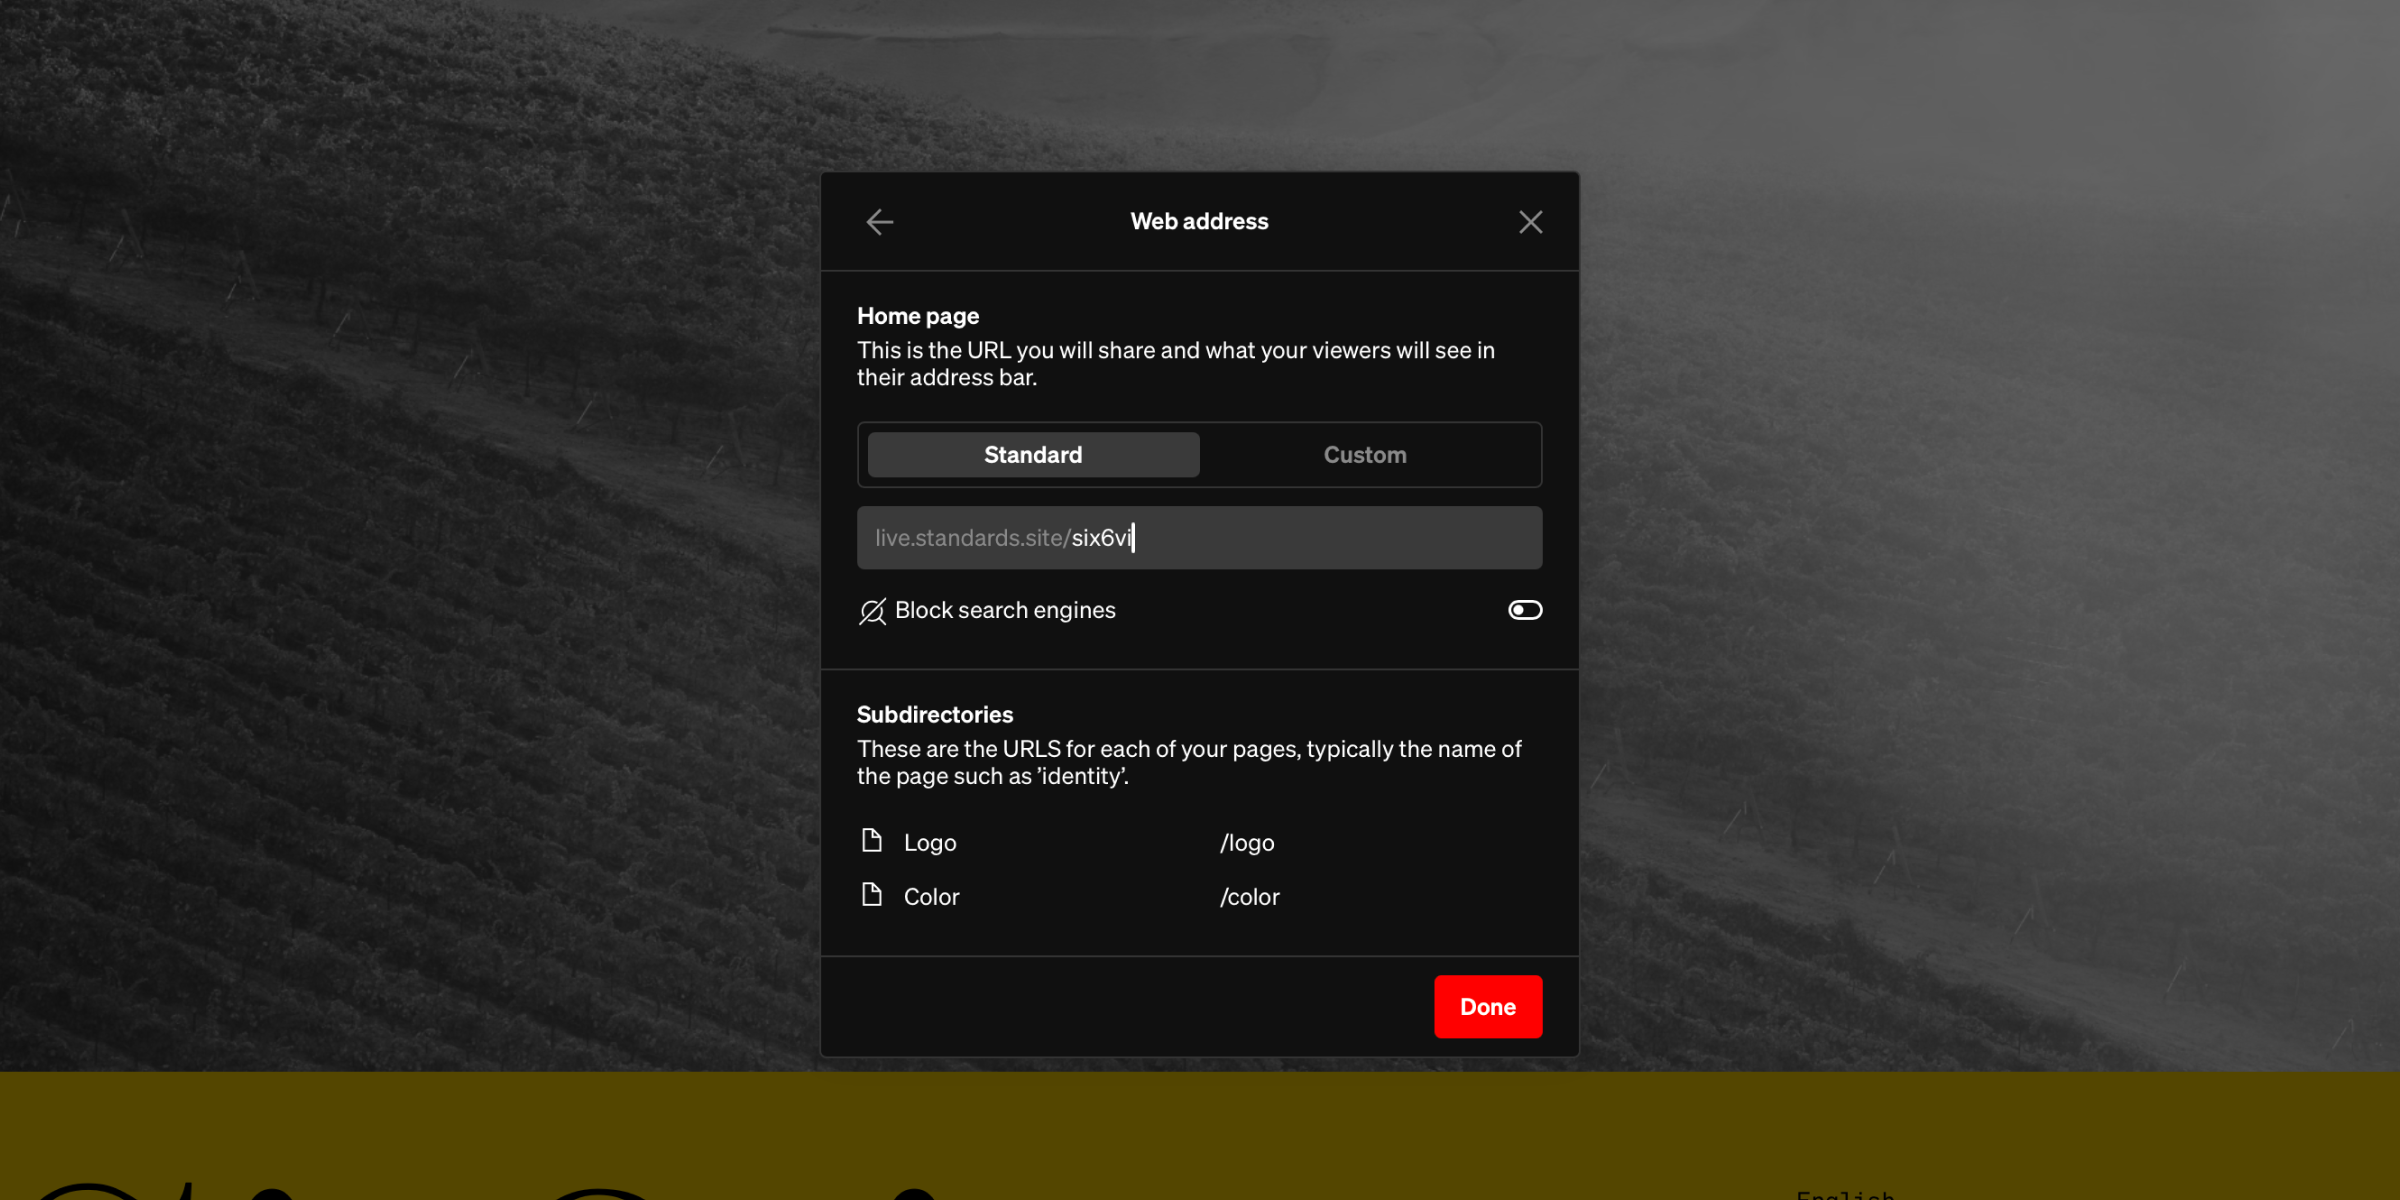
Home page URL
- Standard: Standard web addresses prepend live.standards.site/ to your chosen address
- Custom: Custom web addresses use connected domains and subdomains that have been added to the workspace the project is in.
- Block search engines: Enable this setting to block search engines from showing your Standards site in search results. This can be helpful for sites that should be private.
Subdirectories
Also listed is the URLs for each of your pages, which are typically the name of the page. These must be unique and can be changed from this window or from the page settings sidebar in the editor. Note: Matching subdirectory URLs will result in linking issues. If they match, an alert will show and help direct to the URL issues.Security & access
The project’s security & access settings controls who and how people access your project. This ranges widely, as some projects are fully open to the public, while others are restricted to internal use only and kept secure.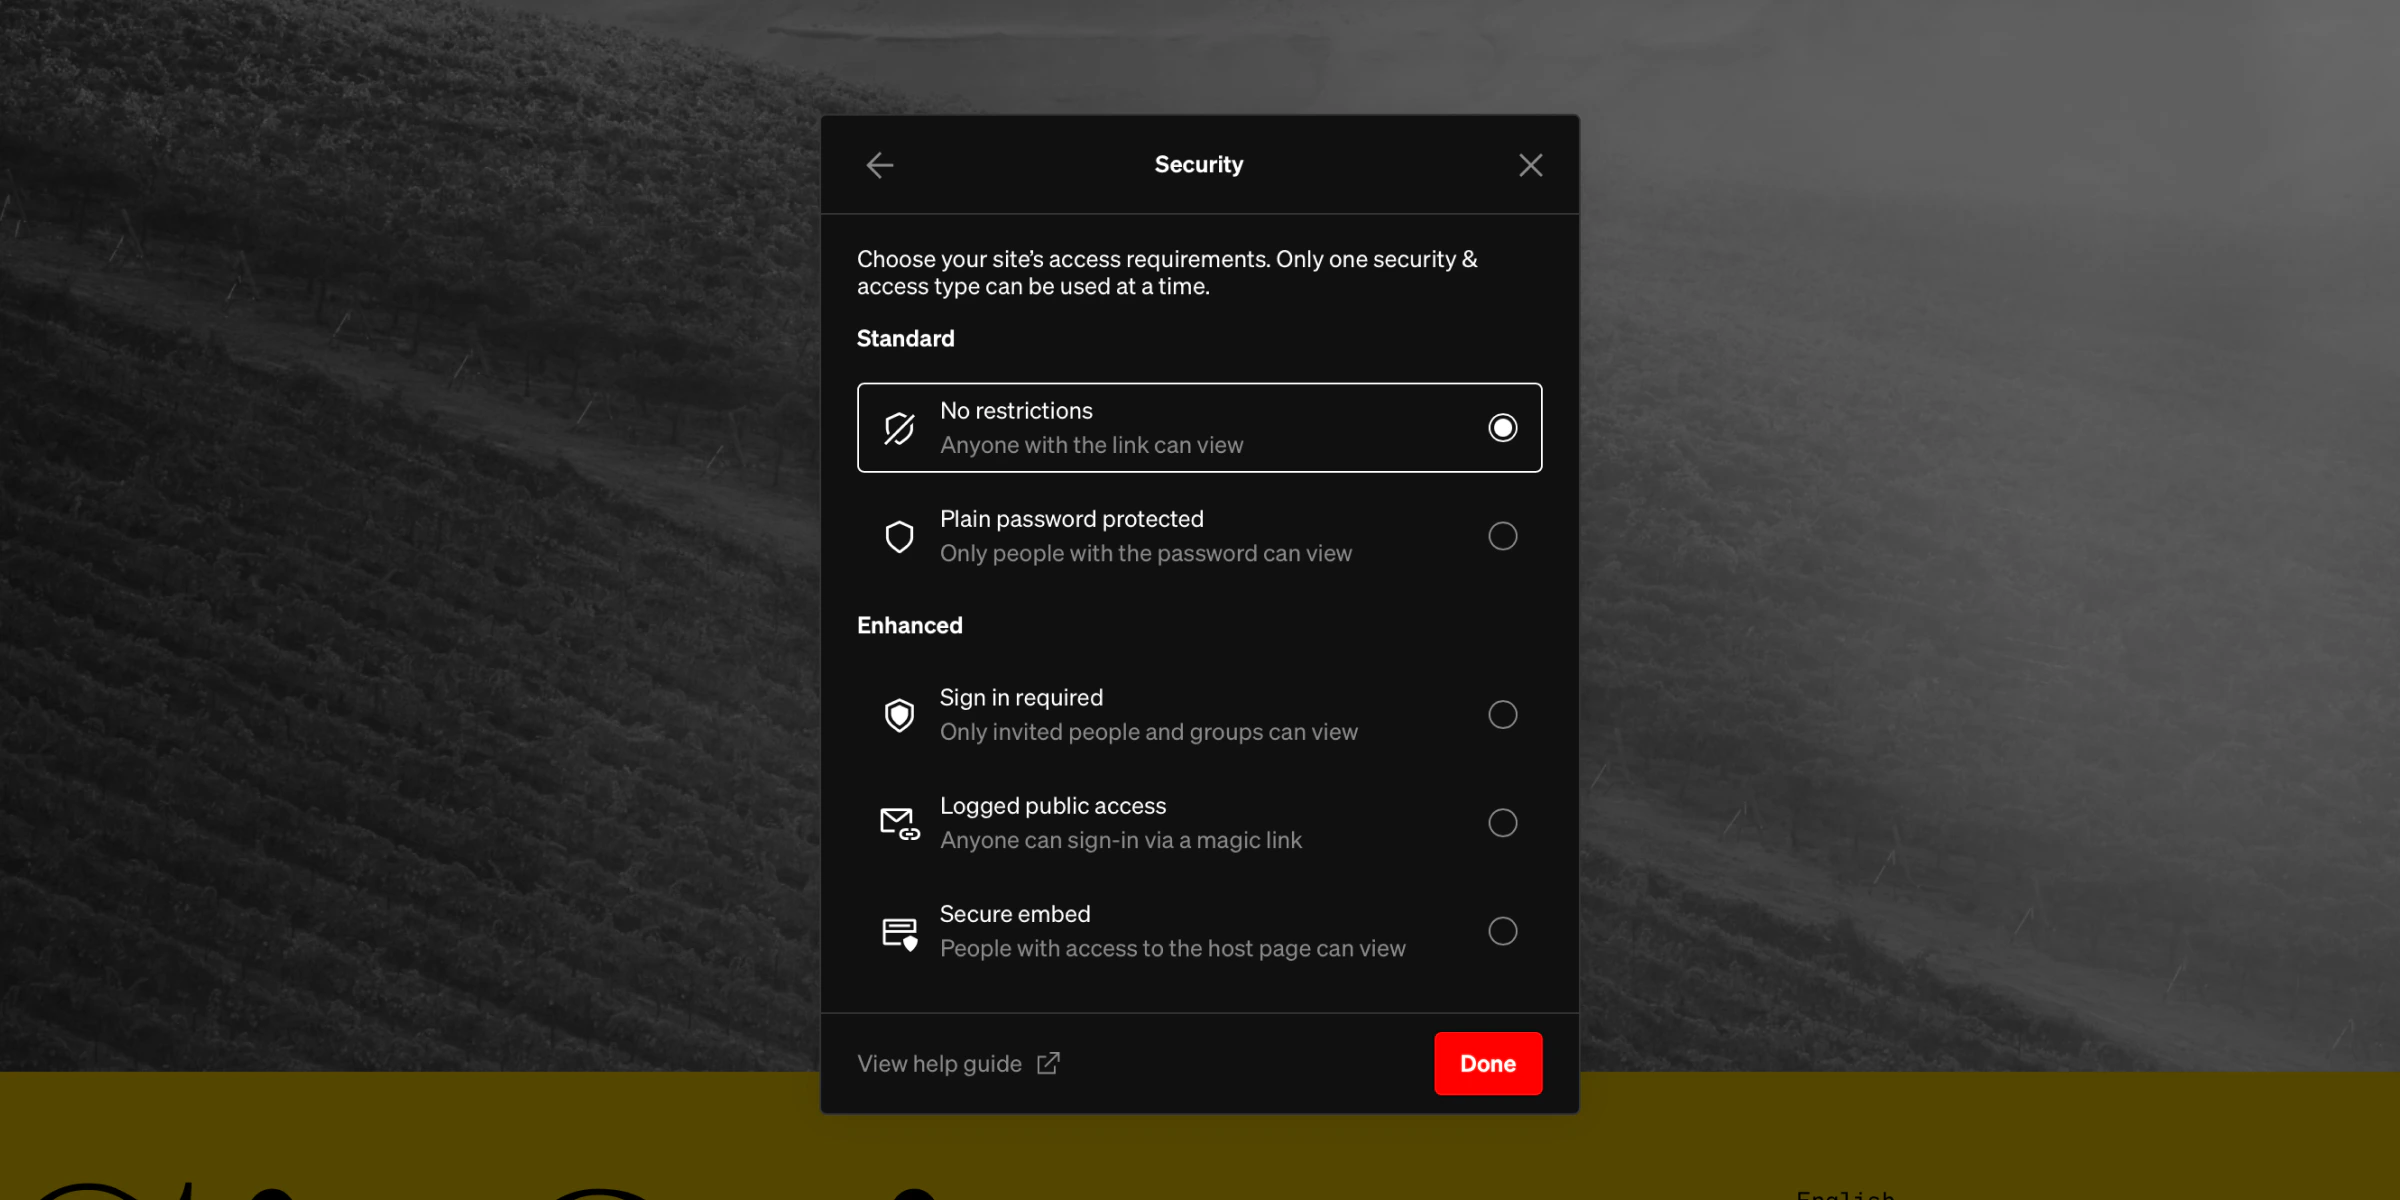
Standard
No restrictions- Every page is fully open to the public; viewable by anyone on the web that knows the web address or is linked to it. This is ideal for projects that can be shared with anyone.
- Secured from public access; a plain password must be entered correctly to view the project.
- This can be set on a per-page basis allowing some pages to require a plain password, and others to be public. This is ideal when a project could be shared publicly but has some pages that should be restricted.
Enhanced
Enterprise Sign-in required- The most secure and configurable security option.
- This can be set on a per-page basis allowing some pages to require sign-in, and others with no restrictions. This is ideal when a project could be shared publicly but has some pages that should be restricted.
- Enables sign-in options including magic link, SAML SSO, Google, Microsoft, and Standards account.
- Fully open to the public; viewable by anyone that enters a valid email address and selects the verification link that is automatically sent to them.
- View data is logged and accessible from the Tracking tab in the project details.
- Secured from public and direct access.
- Projects with this security option must be embedded on a host page that has been allowed.
- Only people with access to the host page are able to view.
Page restrictions
Projects that are either Plain password protected or Sign-in required can choose to set some pages to public. This is ideal when pages of a project can be shared publicly but some are work in progress or contain information that should be restricted.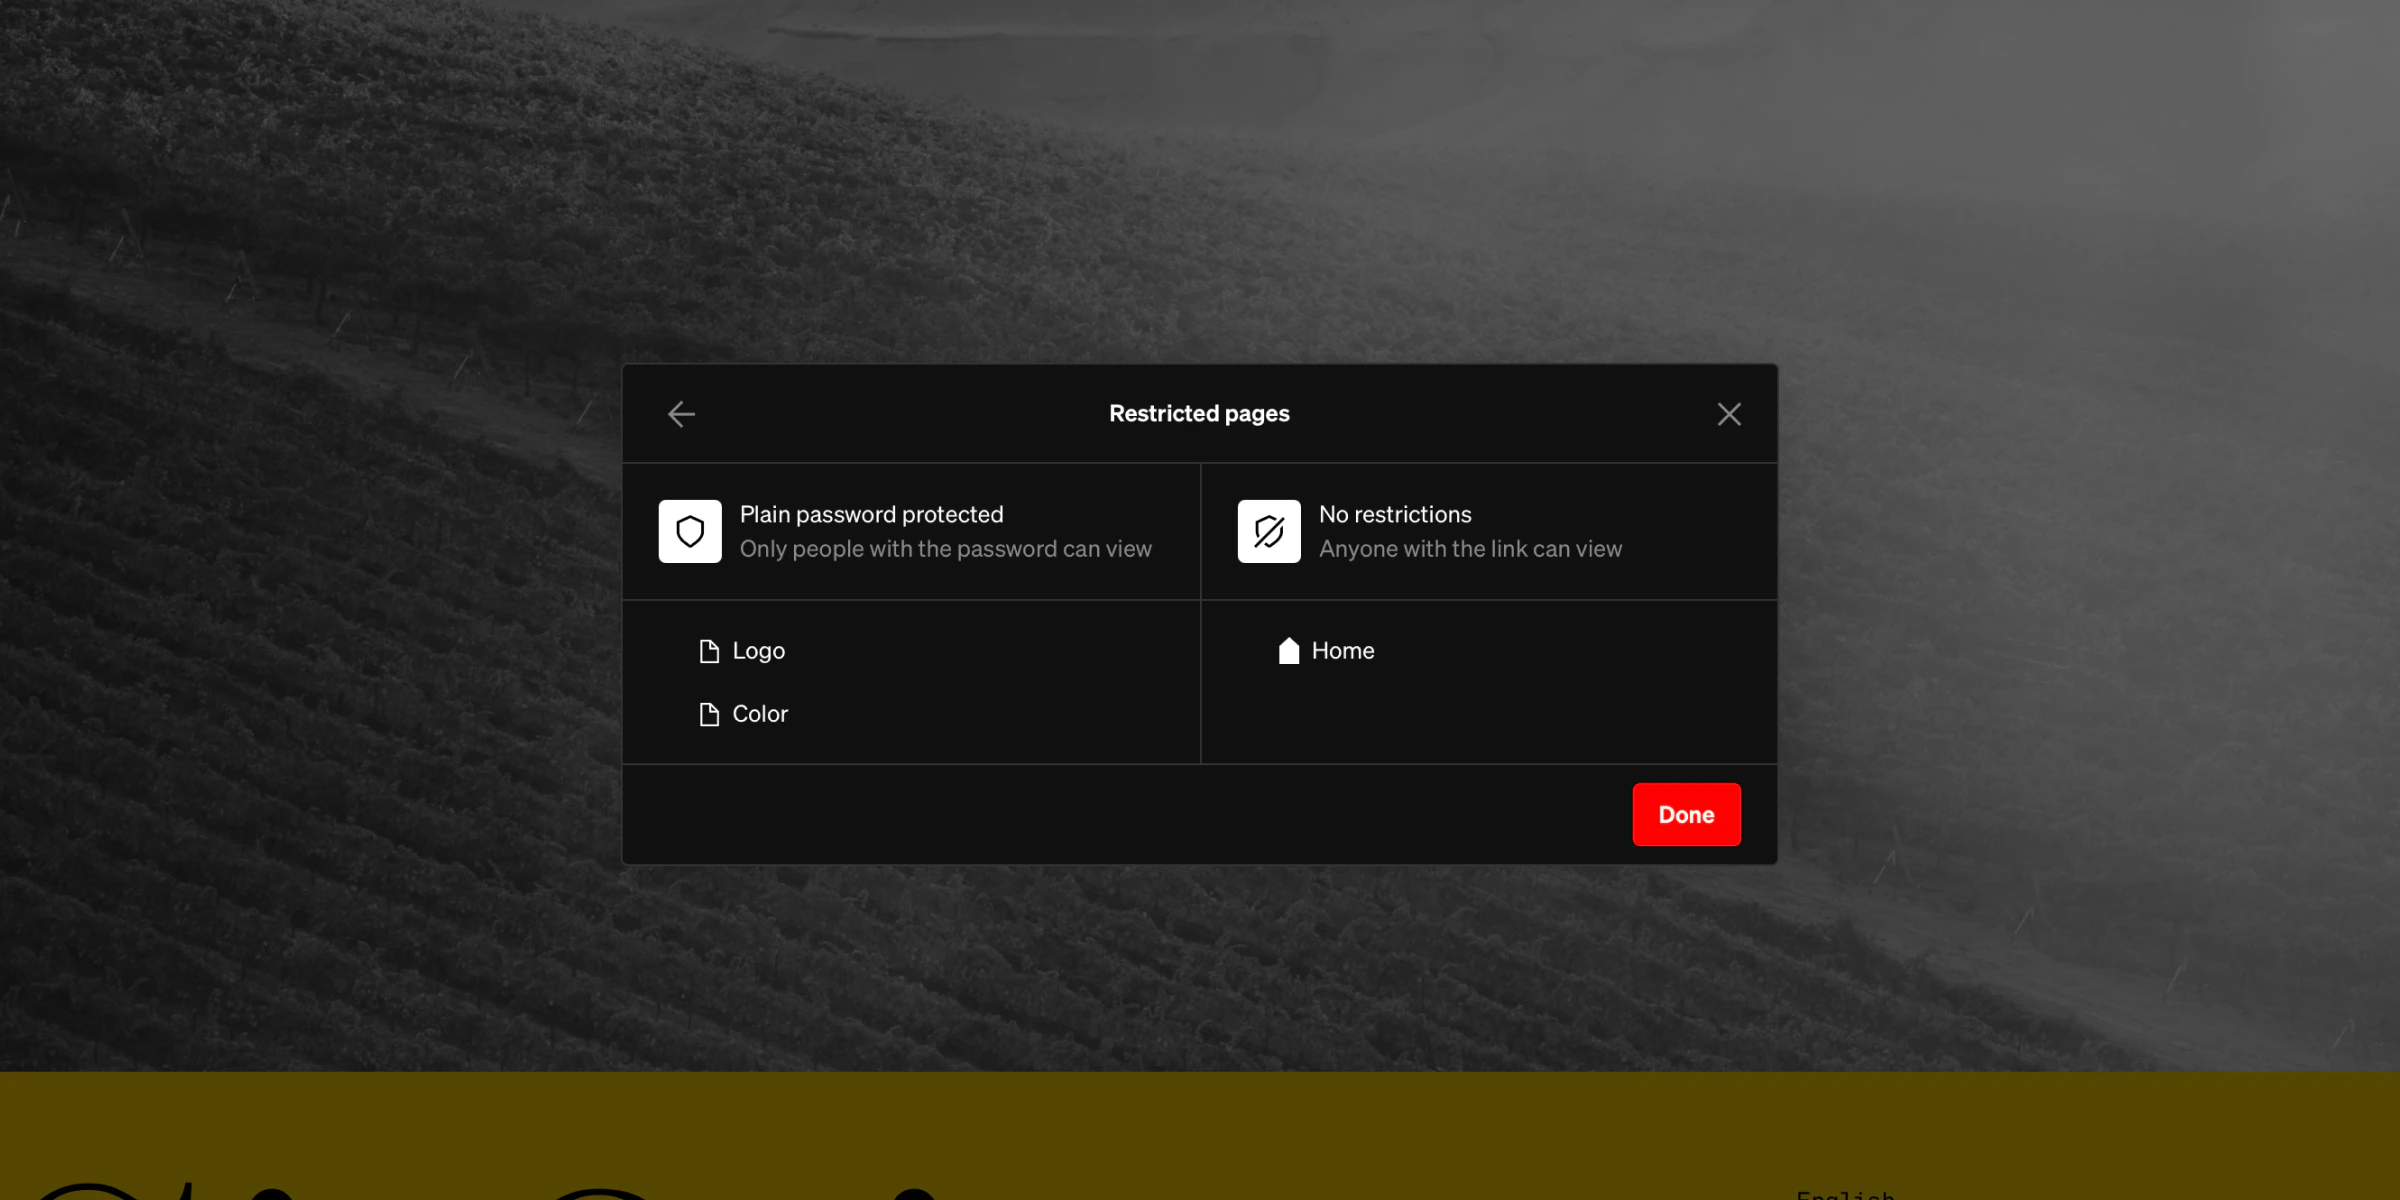
1
Open the publish & share window
Select
Publish & share2
Set restricted access
Choose either Plain password protected or Sign-in required
3
Review restricted pages
Select
Restricted pages then select pages to move them between the two sides, designating their restriction setting.Sign in options
Enterprise Projects published with the Sign-in required security option must choose how visitors can sign into the site.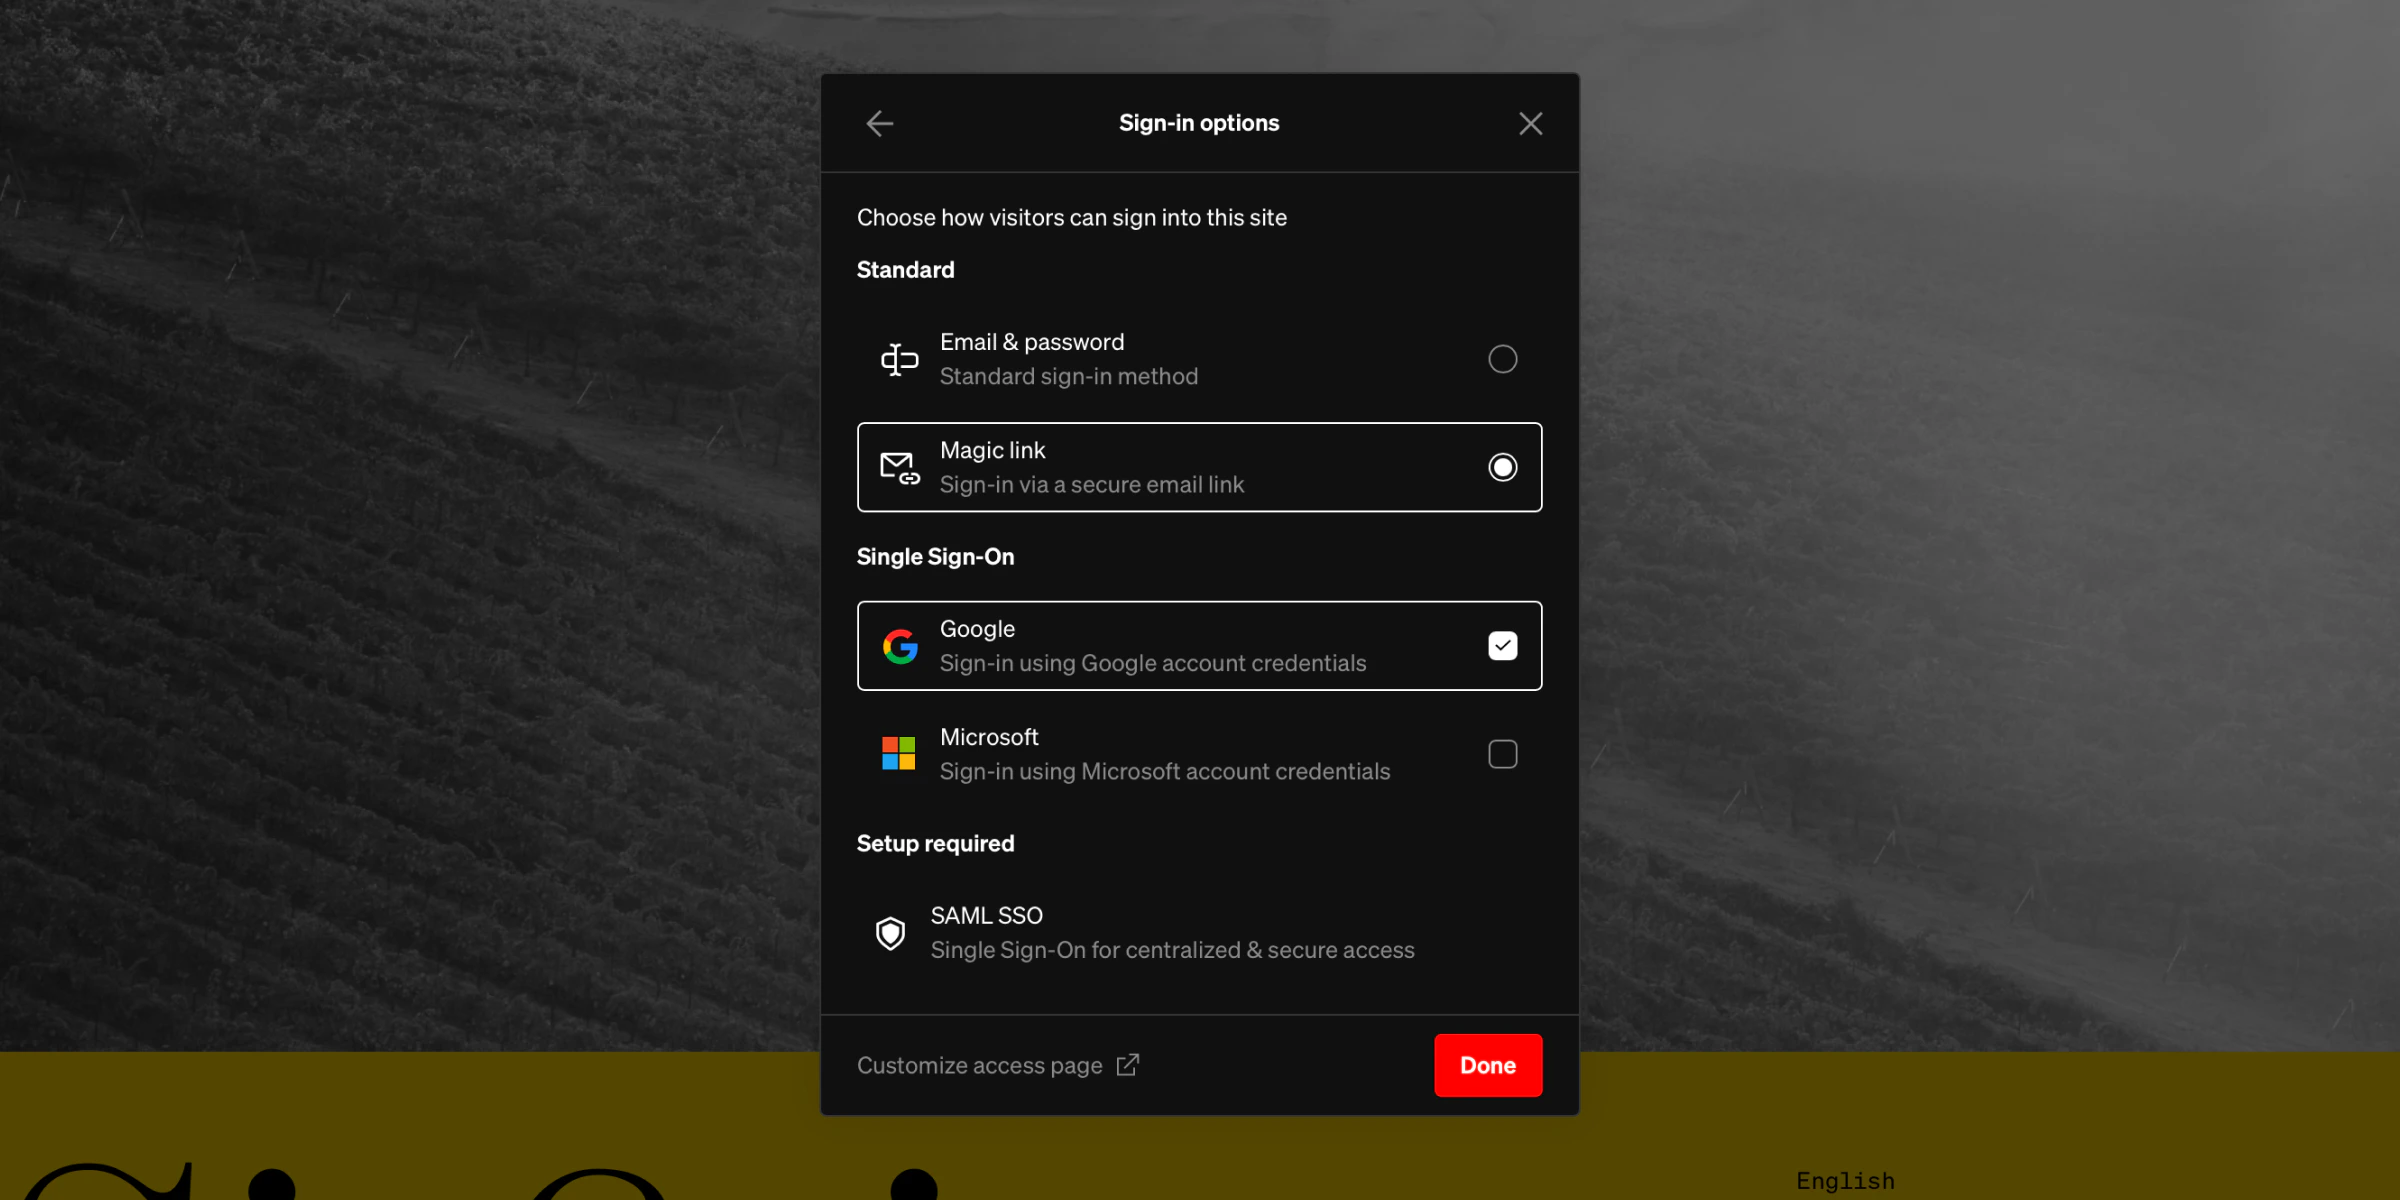
Sign-in options include the combination of:
- Email & password: Viewers are required to sign-in with their Standards account email and password.
- Magic link: Viewers can enter and submit their email address to receive a link. This link will grant them access to the site.
- Google: Viewers can sign in using their Google account credentials.
- Microsoft: Viewers can sign in using their Microsoft account credentials.
- SAML SSO: Viewers can sign in using their organization’s single sign on service. SAML SSO requires initial setup.
Keep in mind
- Choosing the project’s sign-in options in the Publish section of the Publish & share interface will control what is included or excluded from the project sign-in page.
- Viewers signing in to a project must have a Standards account with an email that has either been invited to or matches an allowed domain. Manage who can access your project from the Access tab in the project details.
Share
Every project can be shared with viewers by publishing the site and providing others the live web URL. To share a project, it must first be published and a security option chosen, then can be shared accordingly.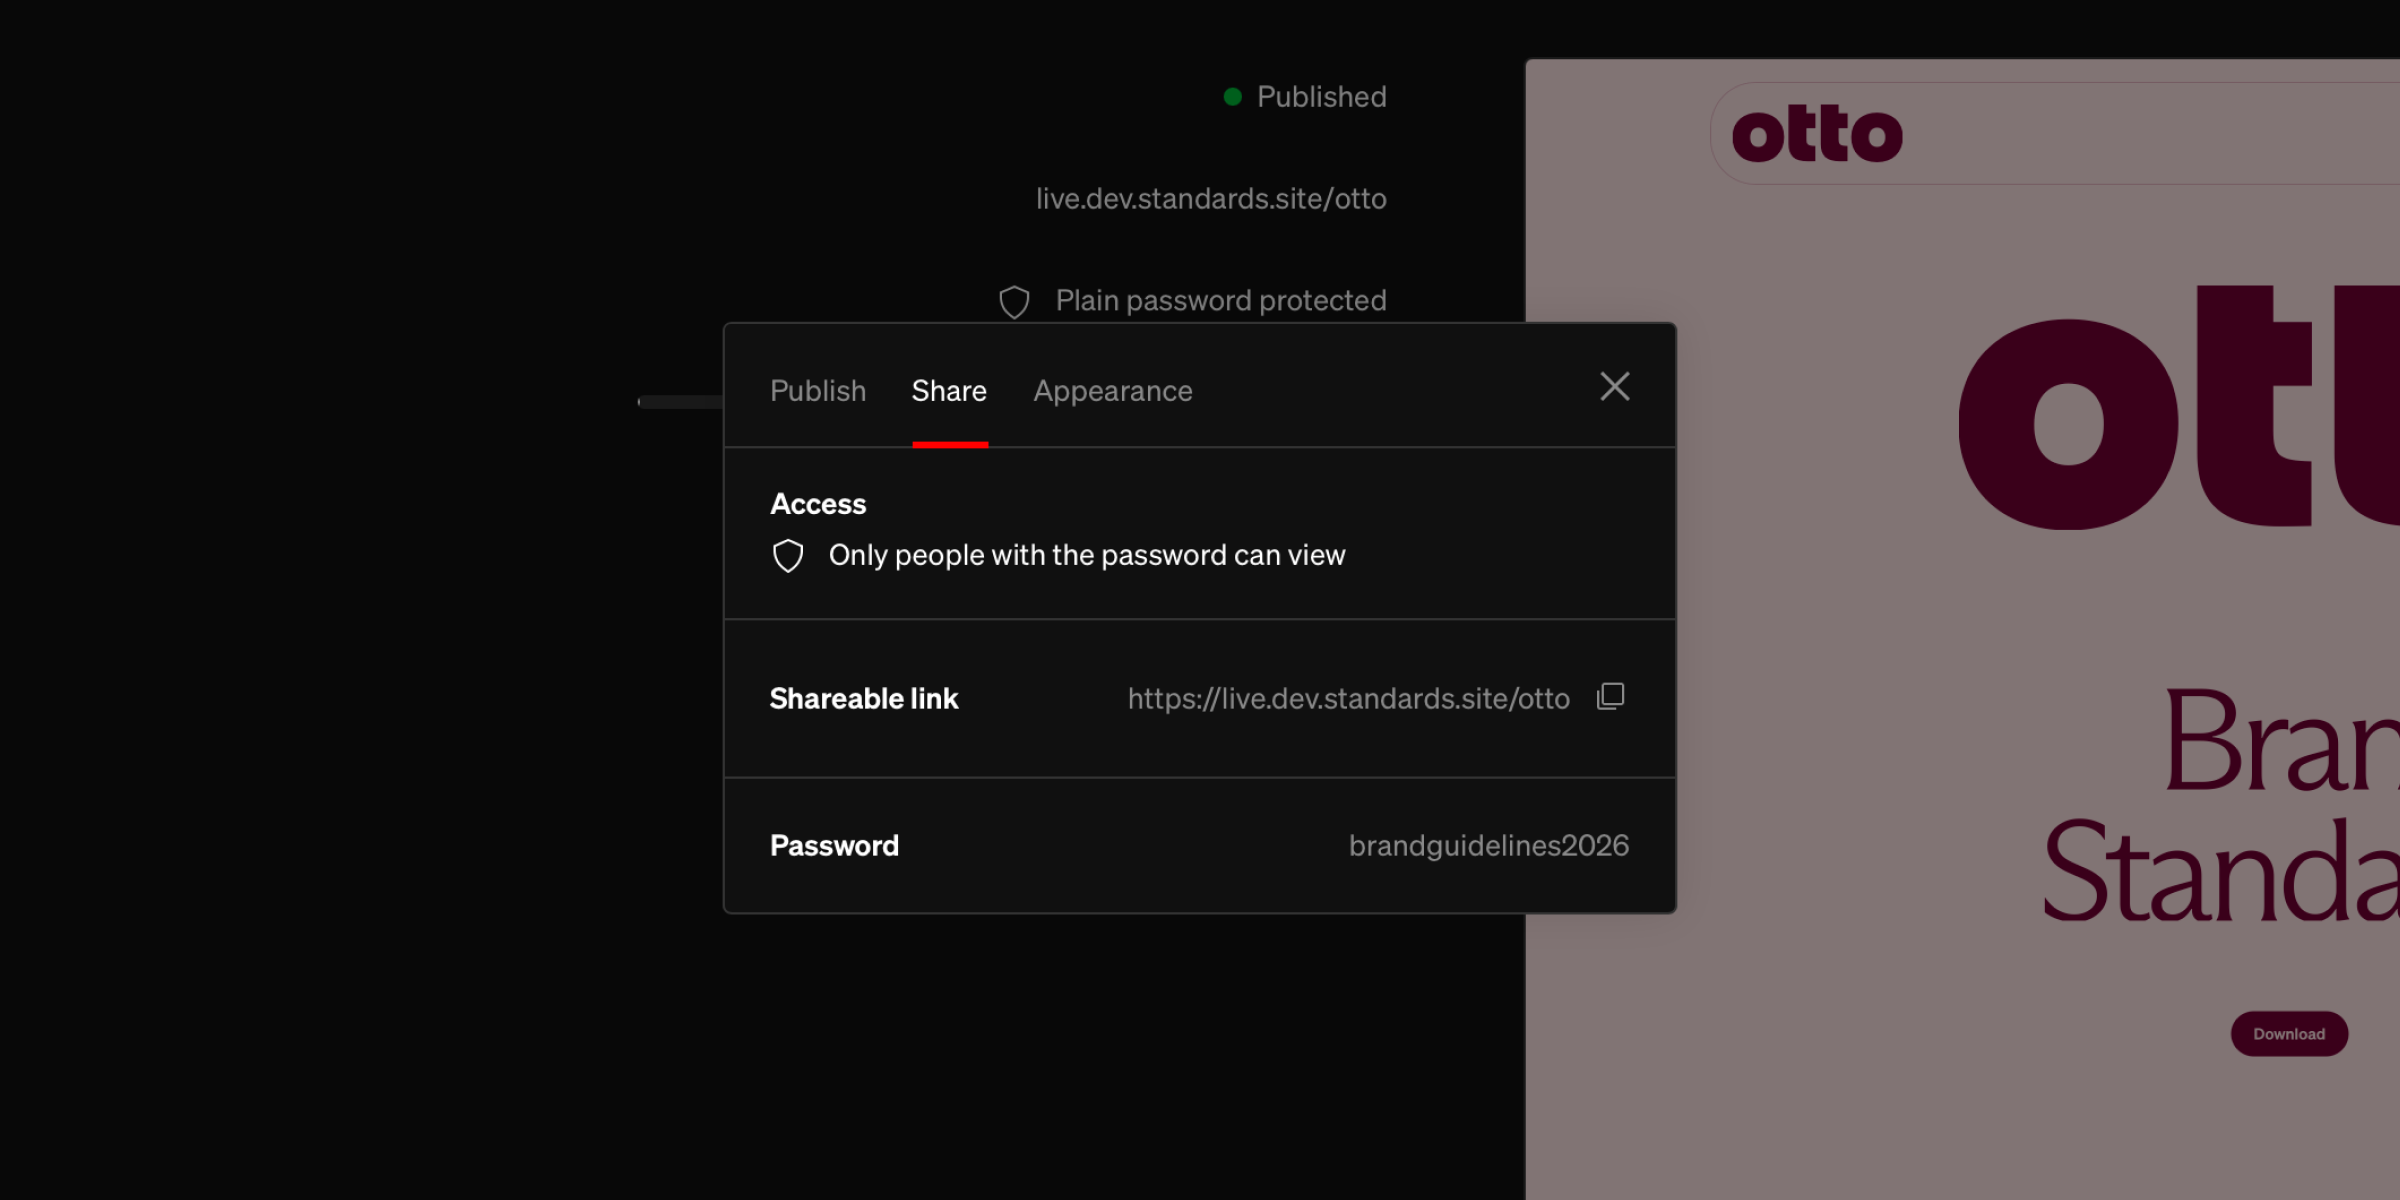
1
Open publish & share window
From the project overview, use the context menu or select the Status, Web address, or Security & access rows. From the editor, select the
Publish & share button in the header.2
Navigate to share section
Select the share tab at the top on the window
3
Share
Choose the appropriate options based on the project’s security setting
Share methods
- No restrictions: Send or post the site’s link for anyone to view.
- Plain password protected: Send the site’s link and plain text password to people and they can view.
- Logged public access: Send or post the site’s link for anyone to create a Standards account to view.
- Sign-in required: Manage individual emails and email domains from the Access tab in the project details to allow viewers with matching email addresses to view.
- Secure embed: Add allowed domains then paste the embed code into websites that match your allowed domains in order to display the Standards site on that page.
Appearance
The appearance tab of the publish and share interface is where the project’s settings that control browser and social preview options.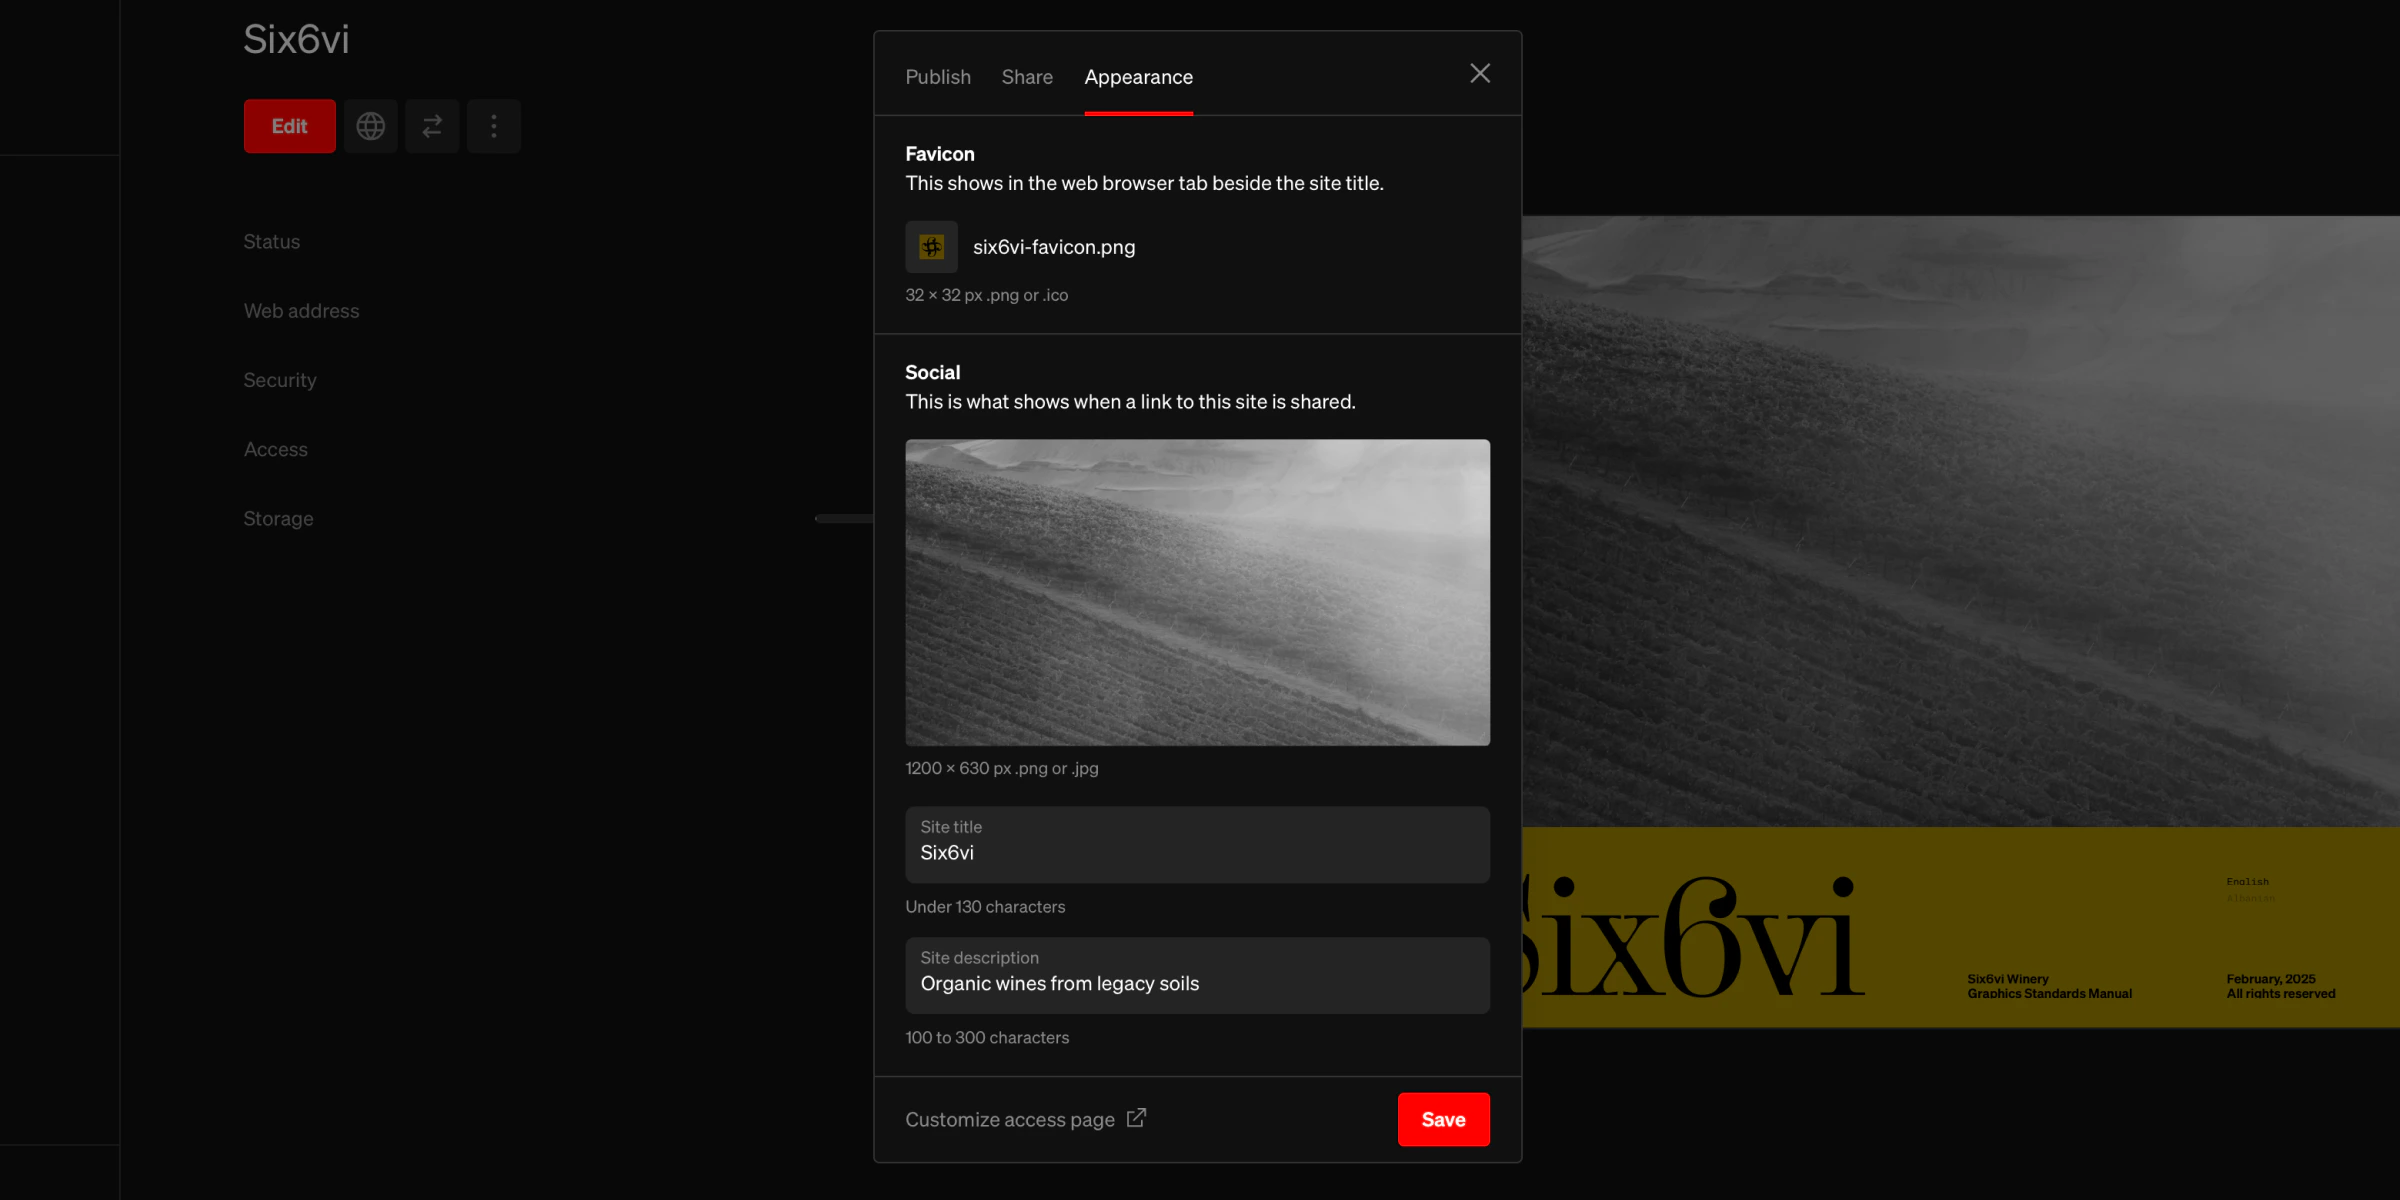
Favicon
This is the small image that shows in the browser tab next to the URL. Often it’s the logo, symbol, or monogram of the brand.Social
The image, title, and description are what show as a preview when a link to the site is shared in social or apps like Slack that show link previews.Project publish status
All projects have a status that indicates if the project has been published and up to date, if it has been published and since edited, or if it’s still a draft.- ⚪ Draft - Not live on the web Only viewable in edit mode by members of the workspace.
- 🟢 Published - Live on the web, up to date Viewable on the web at the set web address. All edits are up to date and matching the live project.
- 🟡 Published - Live on the web, changes were made Viewable on the web but some edits were made that are not reflected on the live project. Selecting
Publish changesin the Publish & share modal will push the changes live and the project status will change to 🟢 Published.
Keep in mind: The Project status will remain the same while transferring, but an icon will appear to indicate the project is being transferred and/or is waiting to be accepted by a receiving party.