> ## Documentation Index
> Fetch the complete documentation index at: https://help.standards.site/llms.txt
> Use this file to discover all available pages before exploring further.
# Sequence
Create slide shows, carousels, and animated marquees with Sequences. They allow for Media, Text, and more to be added to slides, and navigated between.
 ***
## Basics
**Sequences** are an element that can be added to your project layout and consist of three parts: the sequence container, the slide containers, and the controls container. They have a range of uses from animating a sequence of logos, to showing an image slideshow.
***
## Basics
**Sequences** are an element that can be added to your project layout and consist of three parts: the sequence container, the slide containers, and the controls container. They have a range of uses from animating a sequence of logos, to showing an image slideshow.
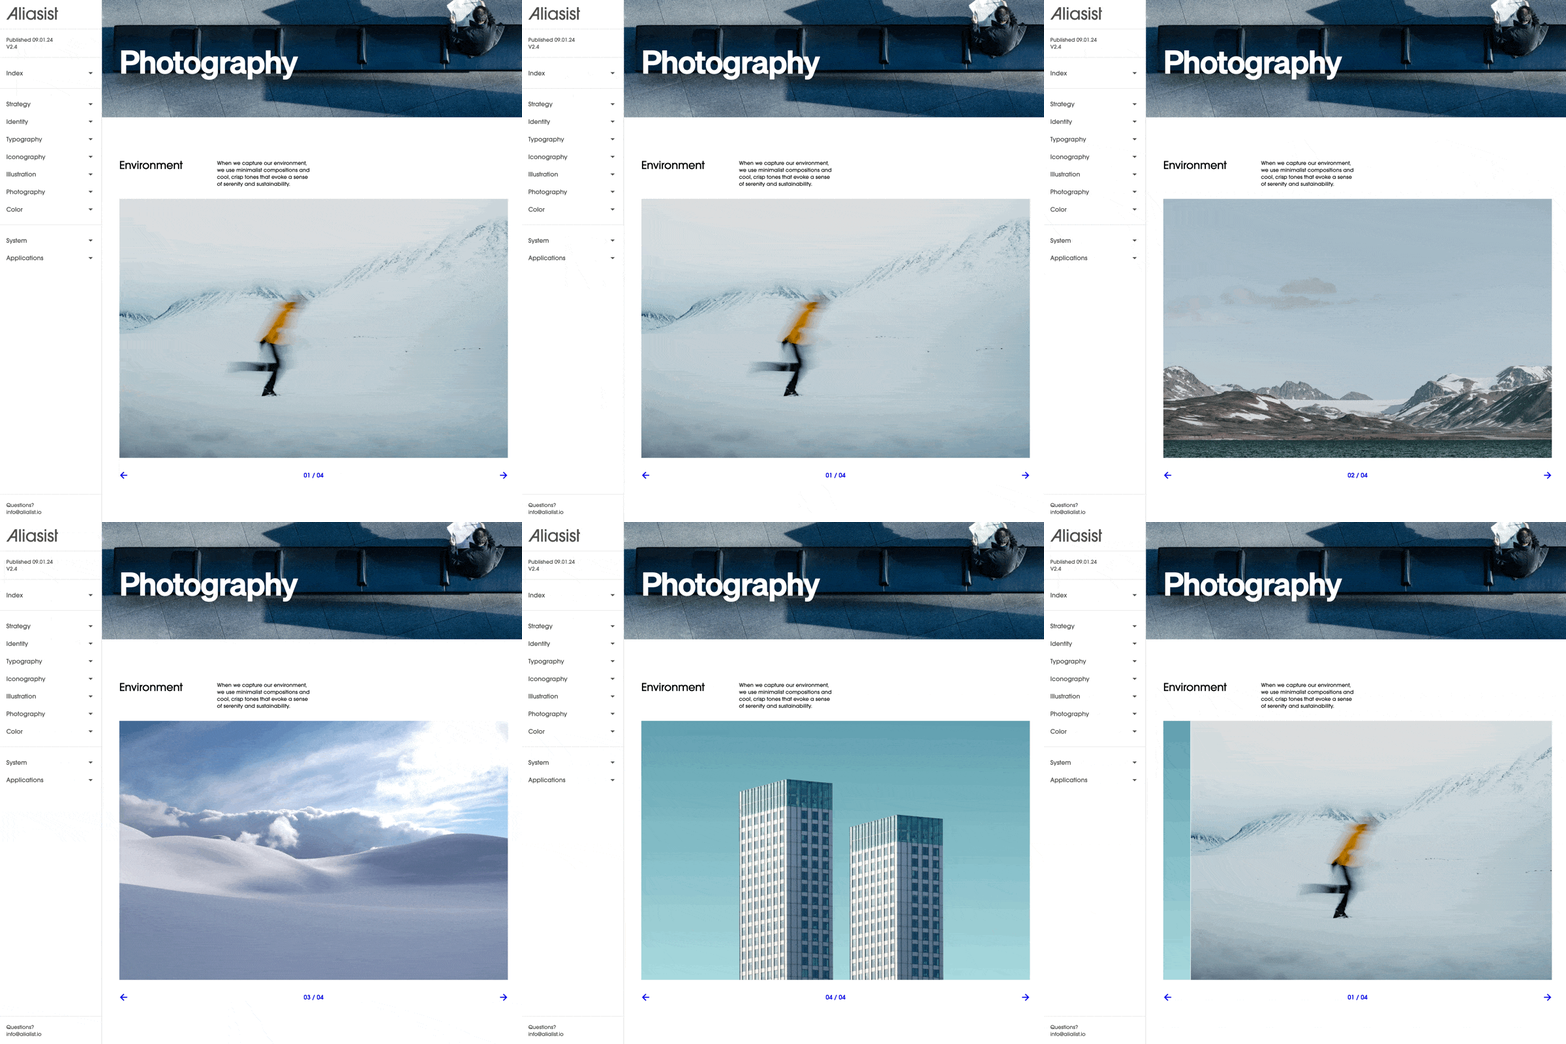
 This example is using a sequence for a single image slideshow. Add a similar sequence using a Slideshow Automation.
This examples is using a sequence to animate the brand’s logo. Add a similar sequence using a Marquee Automation.
### Add a sequence
This example is using a sequence for a single image slideshow. Add a similar sequence using a Slideshow Automation.
This examples is using a sequence to animate the brand’s logo. Add a similar sequence using a Marquee Automation.
### Add a sequence
 From within the editor, select **Sequence** from the `+` menu in the top bar.
Select a point in the project body by selecting between layouts, click + dragging within, or selecting a point inside a column.
Select the media item prepopulated inside slides, select add media from the fill settings group, and choose a file.
Follow the normal add steps with other content types like media and text to add them inside slides.
### Content
With the sequence element selected, content settings are available in the right sidebar.
* **Add slide:** This will add another slide. Tip: you can duplicate existing slides.
* **Quantity:** This field can be edited to add or remove many slides in one action
* **Single slide mode:** When a **Sequence** is in single slide mode, only one slide will show at a given time. This is great for slideshow-style sequences with large wide images.
* **Clip content:** When a **Sequence** has clip content turned on, all slides outside of the container will not show. When turned off, the previous and next slide(s) may be in view.
### Slide settings
Slides are very similar to columns, but are contained within sequences. Add elements into slides, such as **Media** and **Text**. While selecting a **Slide** element inside of a sequence, the right sidebar will display the available settings for styling the slide container.
### Controls settings
**Controls** are included in sequences to allow for navigating and indicating the slides in a sequence, and consist of two **buttons** and an **indicator**. While selecting the controls inside of a sequence, the right sidebar will display the available settings for styling the controls container.
* **Position controls inside:** Turning on position controls inside will allow the **controls** to overlay the slides within a sequence.
### Indicator settings
**Indicators** are included in controls to allow for an indication of the number of slides, and which is actively in view. While selecting the indicator inside of controls, the right sidebar will display the settings for styling the indicators and their container. **Indicators** have a range of states that can be styled individually, or synced together.
***
## Adding content to sequences
Content inside of **sequences** is added to the **slides** within. Add common content into slides, such as Media and Text, or more complex content such as Automations and Components.
### Adding to slides
From within the editor, select elements like **Media** M, **Text** T, and **Button** B from the `+` menu. **Automations** A and **Components** C can also be chosen to add into slides.
Hover over a slide in a sequence, and select the add point overlay.
Slide content can be reorder by click + dragging from the **Contents** layers in the left sidebar
***
## Sequence and transition settings
From within the editor, select **Sequence** from the `+` menu in the top bar.
Select a point in the project body by selecting between layouts, click + dragging within, or selecting a point inside a column.
Select the media item prepopulated inside slides, select add media from the fill settings group, and choose a file.
Follow the normal add steps with other content types like media and text to add them inside slides.
### Content
With the sequence element selected, content settings are available in the right sidebar.
* **Add slide:** This will add another slide. Tip: you can duplicate existing slides.
* **Quantity:** This field can be edited to add or remove many slides in one action
* **Single slide mode:** When a **Sequence** is in single slide mode, only one slide will show at a given time. This is great for slideshow-style sequences with large wide images.
* **Clip content:** When a **Sequence** has clip content turned on, all slides outside of the container will not show. When turned off, the previous and next slide(s) may be in view.
### Slide settings
Slides are very similar to columns, but are contained within sequences. Add elements into slides, such as **Media** and **Text**. While selecting a **Slide** element inside of a sequence, the right sidebar will display the available settings for styling the slide container.
### Controls settings
**Controls** are included in sequences to allow for navigating and indicating the slides in a sequence, and consist of two **buttons** and an **indicator**. While selecting the controls inside of a sequence, the right sidebar will display the available settings for styling the controls container.
* **Position controls inside:** Turning on position controls inside will allow the **controls** to overlay the slides within a sequence.
### Indicator settings
**Indicators** are included in controls to allow for an indication of the number of slides, and which is actively in view. While selecting the indicator inside of controls, the right sidebar will display the settings for styling the indicators and their container. **Indicators** have a range of states that can be styled individually, or synced together.
***
## Adding content to sequences
Content inside of **sequences** is added to the **slides** within. Add common content into slides, such as Media and Text, or more complex content such as Automations and Components.
### Adding to slides
From within the editor, select elements like **Media** M, **Text** T, and **Button** B from the `+` menu. **Automations** A and **Components** C can also be chosen to add into slides.
Hover over a slide in a sequence, and select the add point overlay.
Slide content can be reorder by click + dragging from the **Contents** layers in the left sidebar
***
## Sequence and transition settings
 Control how **Sequences** behave and transition through the contextual toolbar that appears when the Sequence is selected.
### Sequence settings
* **Swipe control:** Touch and click + dragging progresses the sequence.
* **Keyboard control:** Left and right keyboard keys progress the sequence.
* **Loop:** Progressing past the last slide will go to the first slide.
* **Autoplay:** Progresses the sequence on a timer. The pause between is set with a delay field.
### Transition settings
* **Behavior:** Controls the transition effect when slides progress.
* **Instant behavior:** No transition effect.
* **Slide behavior:** Animates left / right.
* **Fade behavior:** Dissolves from 0 to 100% opacity.
* **Motion:** Controls how the animation ramps through the transition.
* **Duration:** Controls how long the animation takes.
Control how **Sequences** behave and transition through the contextual toolbar that appears when the Sequence is selected.
### Sequence settings
* **Swipe control:** Touch and click + dragging progresses the sequence.
* **Keyboard control:** Left and right keyboard keys progress the sequence.
* **Loop:** Progressing past the last slide will go to the first slide.
* **Autoplay:** Progresses the sequence on a timer. The pause between is set with a delay field.
### Transition settings
* **Behavior:** Controls the transition effect when slides progress.
* **Instant behavior:** No transition effect.
* **Slide behavior:** Animates left / right.
* **Fade behavior:** Dissolves from 0 to 100% opacity.
* **Motion:** Controls how the animation ramps through the transition.
* **Duration:** Controls how long the animation takes.