> ## Documentation Index
> Fetch the complete documentation index at: https://help.standards.site/llms.txt
> Use this file to discover all available pages before exploring further.
# Project Transfers
Transfer projects between workspaces or as a final hand-off to a client. A Pro or Enterprise plan is required to receive project transfers.
 ***
## Why transfer projects?
There are two primary reasons to transfer projects in Standards:
1. **Transfer between workspaces:** This is typical when organizing projects such as moving a project from a private workspace to one with a team or client in it.
2. **Transfer to another user:** This is typically when handing off between a design agency and a client. This is also a common way to change ownership of a project.
### Keep in mind
* Transferring a project that uses a custom domain will transfer the custom domain to the new workspace.
* Transferring projects changes ownership to the receiving workspace owner.
* Members of the receiving workspace will be able to edit and manage settings on the project.
***
## Transfer between workspaces
From the workspace dashboard, select a project to view its settings
* Select `Transfer`
* Under **Transfer destination** select `To workspace`
Select the preferred workspace in the drop-down menu.
You can choose to create a duplicate of the project that will stay in the workspace. Duplicating a project creates an exact unpublished copy.
* Select `Review transfer`
* After making sure your information is correct, select `Confirm`
### What to expect
* Your project will now have a pending icon until an owner or admin in the receiving workspace approves it.
* If transferring to a workspace you own or are an admin within, the transfer will happen automatically without approval needed.
***
## Transfer to another user
From the workspace dashboard, select a project to view its settings
* Select `Transfer`
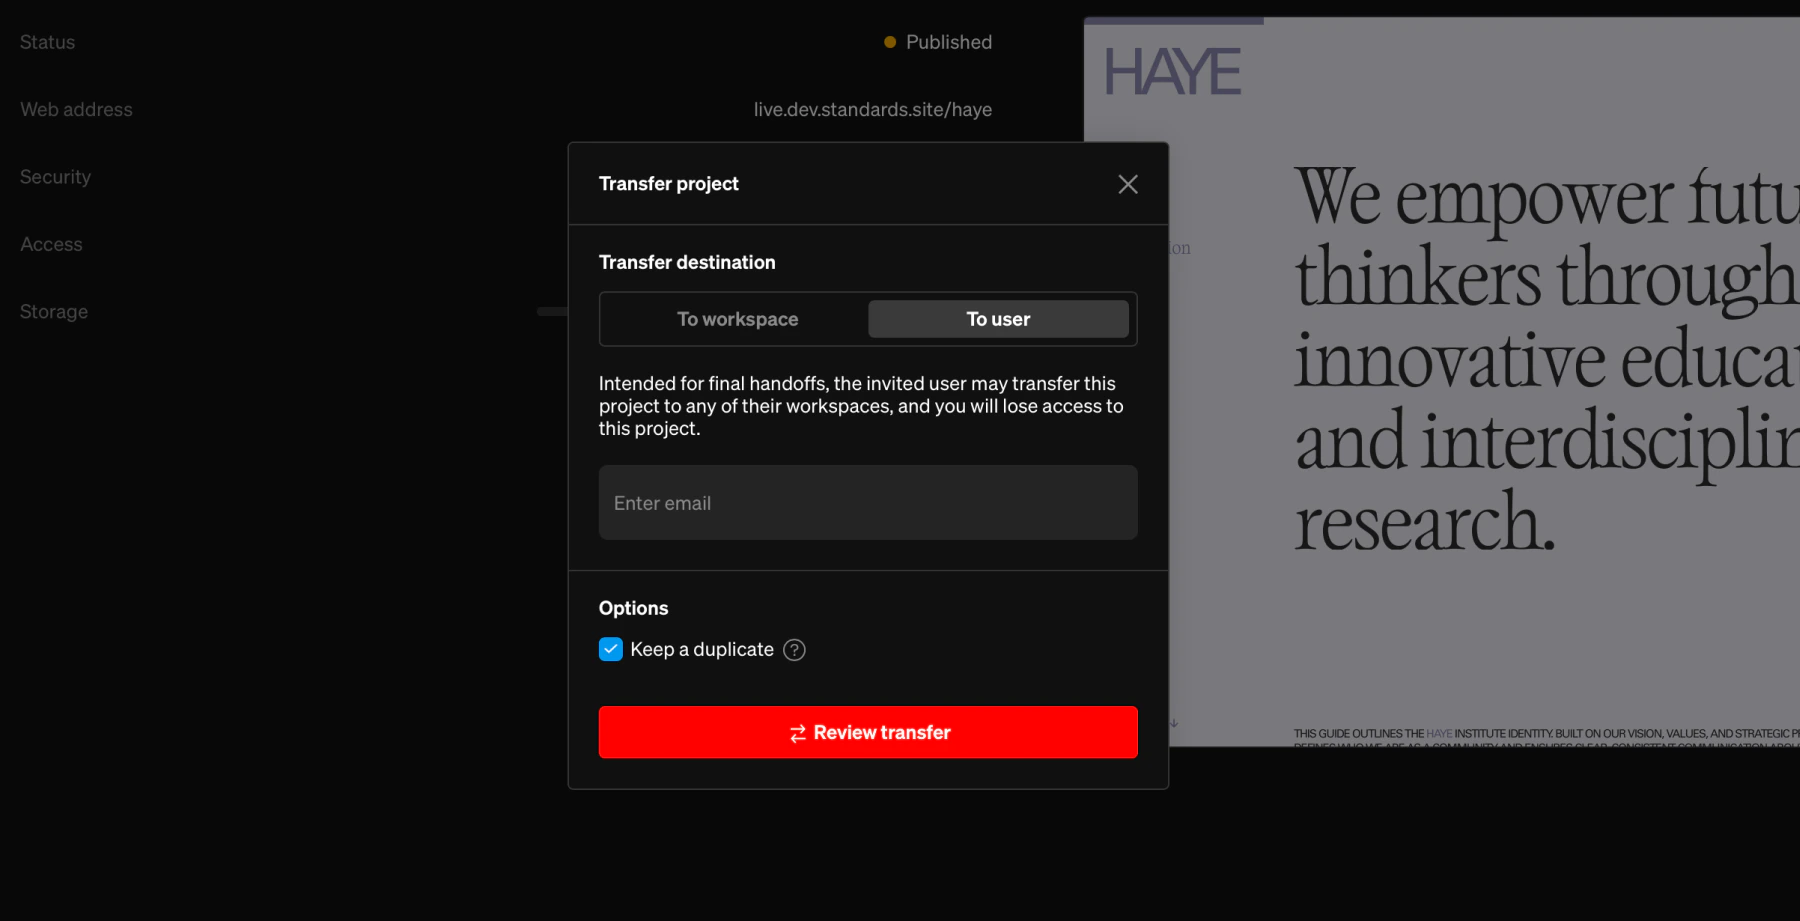
* Under **Transfer destination** select `To user`
Input the email address of the recipient
You can choose to create a duplicate of the project that will stay in the workspace. Duplicating a project creates an exact unpublished copy.
* Select `Review transfer`
* After making sure your information is correct, select `Confirm`
### What to expect
* Your project will now have a pending icon until the receiving user approves it
* The recipient will receive an email notifying them of the transfer request
* If the recipient does not have an account, they will be directed to sign up
* A Pro or Enterprise plan is required to accept the project transfer
* You can cancel a transfer by going to the project settings and selecting `Cancel transfer`
***
## Accept a project transfer
If you are the recipient of a project transfer, a notification to review pending transfers will appear in the dashboard beside your avatar. Additionally, as the recipient you will receive an email to review the project transfer.
Within the dashboard, select the bell icon at the top right
Within this tab are pending and completed transfers, select `Review` on the pending transfer
* From the workspace selection dropdown, choose the workspace you'd like the project to transfer into.
* Note: A paid plan is required to accept project transfers
* Select `Transfer project` to approve the transfer.
* Note: Declining a transfer will deny it and the sender will retain the project in their workspace.
***
## Troubleshooting
In your workspace, select the project that’s pending transfer. Select `Cancel transfer` from the project’s settings.
When a project transfer is pending approval it is locked from editing publish and share options.
If you are a member of the workspace the project is transferred into, you can navigate to that workspace from the workspace selection dropdown (top left of dashboard) then manage and edit the project in the new location. If you're not a member, you will no longer have any access to manage or edit that project.
***
## Why transfer projects?
There are two primary reasons to transfer projects in Standards:
1. **Transfer between workspaces:** This is typical when organizing projects such as moving a project from a private workspace to one with a team or client in it.
2. **Transfer to another user:** This is typically when handing off between a design agency and a client. This is also a common way to change ownership of a project.
### Keep in mind
* Transferring a project that uses a custom domain will transfer the custom domain to the new workspace.
* Transferring projects changes ownership to the receiving workspace owner.
* Members of the receiving workspace will be able to edit and manage settings on the project.
***
## Transfer between workspaces
From the workspace dashboard, select a project to view its settings
* Select `Transfer`
* Under **Transfer destination** select `To workspace`
Select the preferred workspace in the drop-down menu.
You can choose to create a duplicate of the project that will stay in the workspace. Duplicating a project creates an exact unpublished copy.
* Select `Review transfer`
* After making sure your information is correct, select `Confirm`
### What to expect
* Your project will now have a pending icon until an owner or admin in the receiving workspace approves it.
* If transferring to a workspace you own or are an admin within, the transfer will happen automatically without approval needed.
***
## Transfer to another user
From the workspace dashboard, select a project to view its settings
* Select `Transfer`
* Under **Transfer destination** select `To user`
Input the email address of the recipient
You can choose to create a duplicate of the project that will stay in the workspace. Duplicating a project creates an exact unpublished copy.
* Select `Review transfer`
* After making sure your information is correct, select `Confirm`
### What to expect
* Your project will now have a pending icon until the receiving user approves it
* The recipient will receive an email notifying them of the transfer request
* If the recipient does not have an account, they will be directed to sign up
* A Pro or Enterprise plan is required to accept the project transfer
* You can cancel a transfer by going to the project settings and selecting `Cancel transfer`
***
## Accept a project transfer
If you are the recipient of a project transfer, a notification to review pending transfers will appear in the dashboard beside your avatar. Additionally, as the recipient you will receive an email to review the project transfer.
Within the dashboard, select the bell icon at the top right
Within this tab are pending and completed transfers, select `Review` on the pending transfer
* From the workspace selection dropdown, choose the workspace you'd like the project to transfer into.
* Note: A paid plan is required to accept project transfers
* Select `Transfer project` to approve the transfer.
* Note: Declining a transfer will deny it and the sender will retain the project in their workspace.
***
## Troubleshooting
In your workspace, select the project that’s pending transfer. Select `Cancel transfer` from the project’s settings.
When a project transfer is pending approval it is locked from editing publish and share options.
If you are a member of the workspace the project is transferred into, you can navigate to that workspace from the workspace selection dropdown (top left of dashboard) then manage and edit the project in the new location. If you're not a member, you will no longer have any access to manage or edit that project.